 Do you ever buy craft supplies on a whim, just because they are so pretty and even though you've got no idea what you are going to do with them?
Thought so. Me too. Just such a whim struck me at a craft show earlier this year and I bought a skein of multi-coloured recycled sari ribbon yarn. I can't remember the name of the company I bought it from, but it was similar to this one.

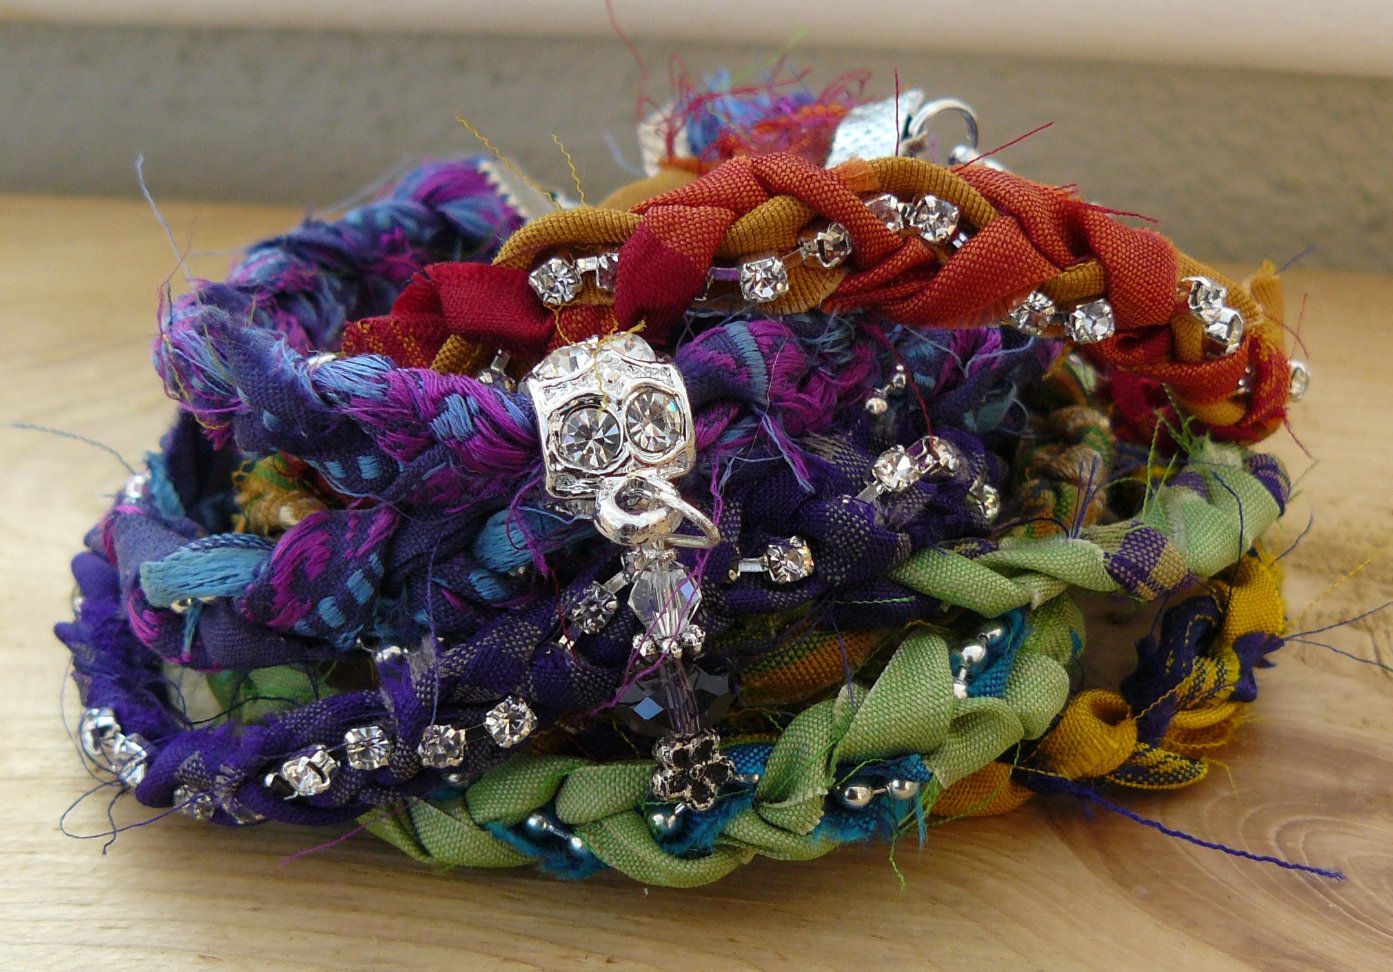
Here is my version:-
Do you want a tutorial ~ honestly, you hardly need one, but anyway here is what I did:-
You'll need: sari ribbon yarn, ribbon clamps, jump rings, clasps, pliers and glue. Optional extras: bead chain, diamante chain, charms and charm carriers
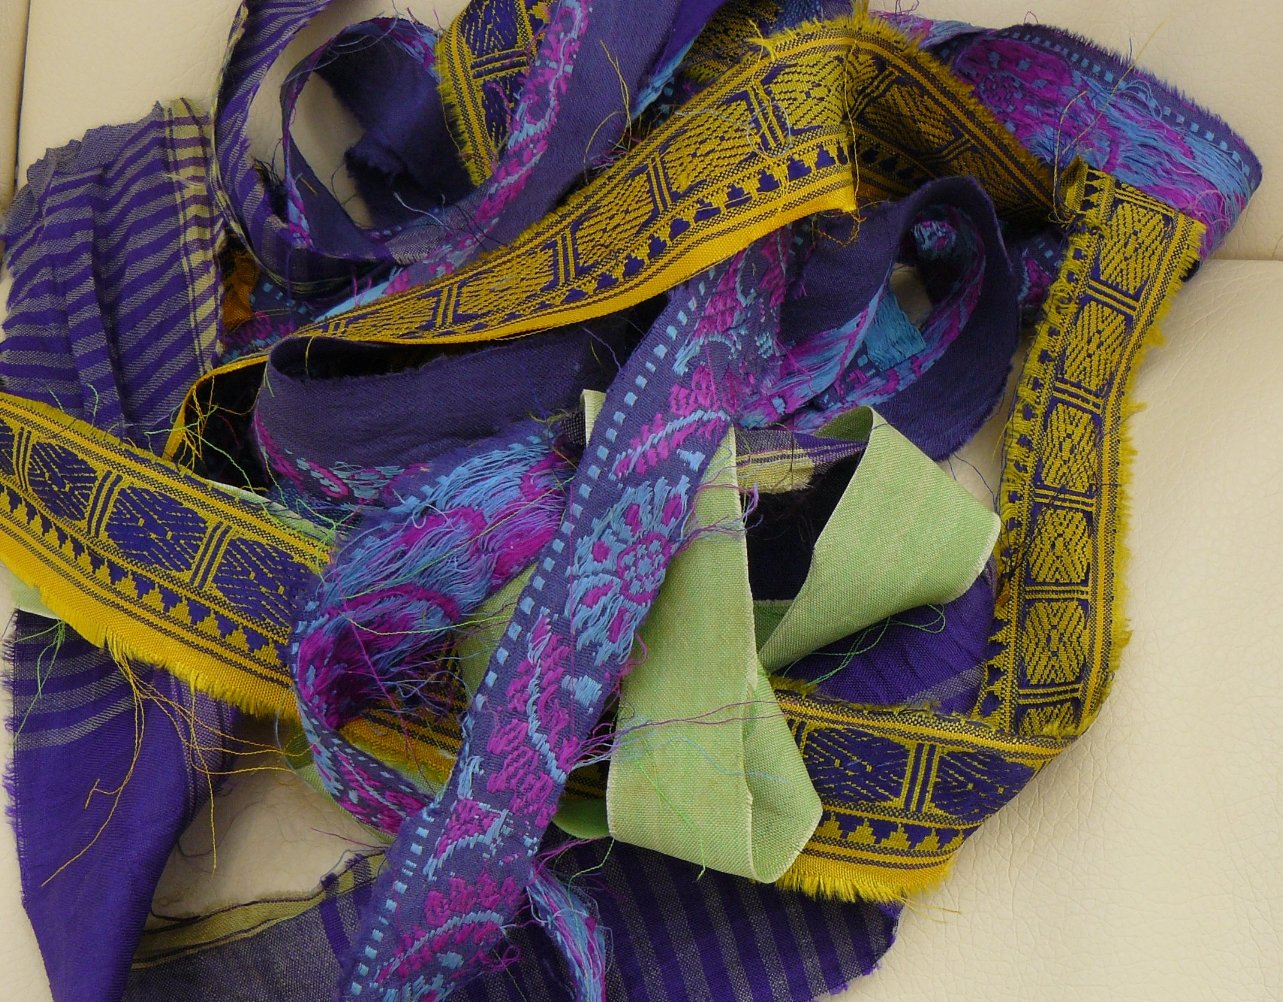
Step 2. Cut into lengths. You'll need them longer than your wrist as you'll be plaiting them and so they'll end up shorter than the cut length. I cut mine to about 30cm long, which is a little more than necessary, but better to have too much than too little. I also trimmed mine widthwise to about 1cm wide.
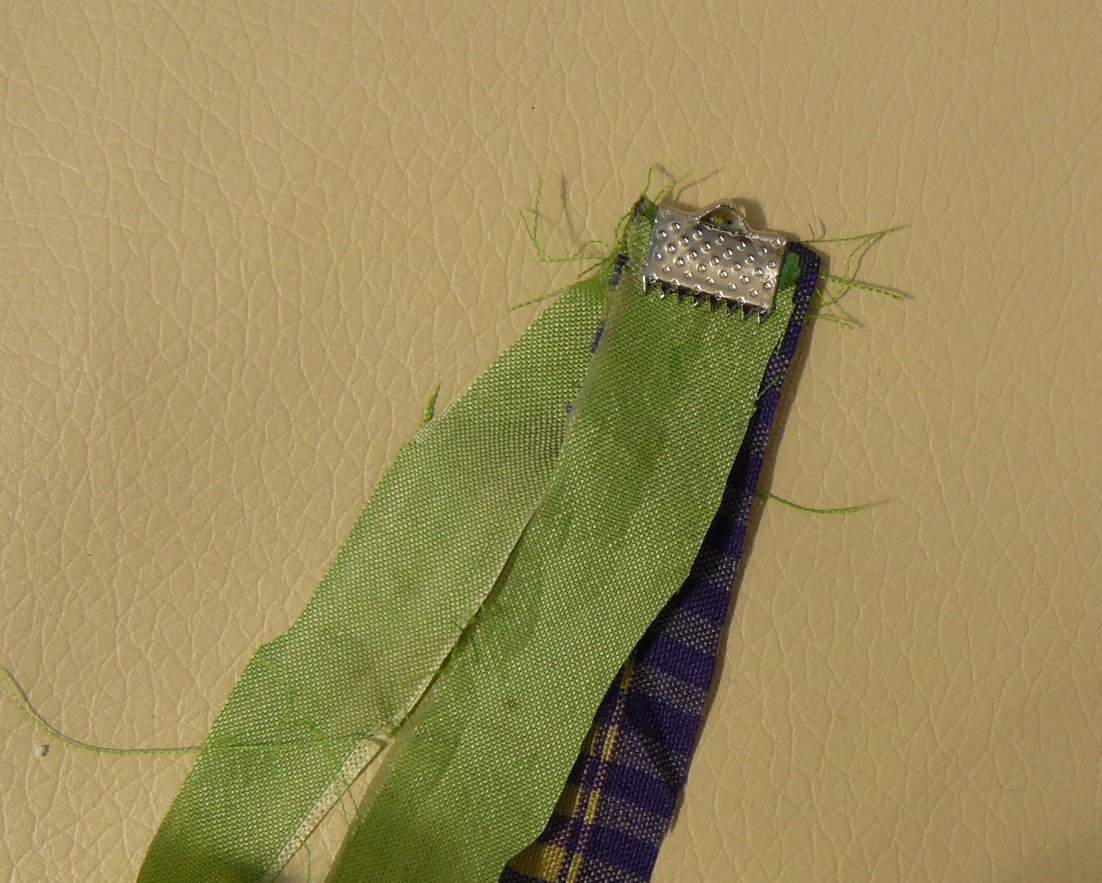


Step 7. Use jump rings to attach clasp to ribbon clamps

And you're done.
To vary them up a bit I've squeezed a length of ball chain or diamante chain into the ribbon clamps with the centre ribbon on some of them, and plaited it along with them. You'll need to attach it right in the centre of the ribbon clamp so it will close around it, and make sure it has a drop of glue on it too. With one of them I slipped a diamante charm carrier onto the plait before I placed the 2nd ribbon clamp, then attached a small bead dangle
I'm thinking they'd look really pretty made from strips cut from liberty print cottons with pearls worked in too.
Linking this up to Think Pink Sundays at Flamingo Toes and Make it Wear it at The Train to Crazy
11 comments:
Wow they looking so sweet xxx
Great craft idea! They look really nice too.
And yes, I buy craft items thinking "I can use that!"
Very pretty and yes, i have a cupboard full of stuff that 'might come in handy one day' lol
Your bracelet is stunning. I have a basement full of stuff to use up. This will help. I am pinning it.
Thanks
Your bracelets are lovely and thank you for sharing your technique. Creative Hearts are Happy Hearts...
I used to just see, want and buy with no idea what i was going to do. Nowdays I have to watch the pennies more so I really think about what I am going to buy and how much use I will get from it. That doesnt mean I dont still have loads left from the days when i did just buy randomly though lol. All I need is a pinch of your talent and more hours in the day.
Such a great idea, Christine--they are all so pretty!
Wow they look fantastic Christine.
Wow another beautifully executed clever idea!!!
I am pinning this to my To Do board. I think I could handle it and I love wearing funky bracelets.
Thanks for the inspiration.
Ooh, these are just gorgeous! Thanks so much for sharing how you made these beauties! :)
Post a Comment