Monday, 27 February 2012

An Experiment in Upcycling

I've been reading Mollie Makes again. I know, it can be dangerous...
This time I was inspired to take a couple of vintage tea towels and turn them into a messenger bag. I'm all about upcycling these days!
I'm not so sure about the Scenic Cornwall one now though, I think it will make me feel like a tourist when I use it. I may have another go using just the loud 70s floral design (I've got tons of them, they came from my Aunt's house). I think I'll adapt it so it has a fold over flap as well.
And shorten the straps, this one hangs somewhere near my knees. Mind you, so do a lot of things these days ;(

Sunday, 19 February 2012

Presents and Prizes

I've been single handedly keeping  the Post Office in business this week.
First it was dear Barb's birthday, and I sent her this little brooch I made (if you don't already know, Barb loves sheep). I embroidered the little sheep on a piece of linen, then used it to cover one of theose self-cover button forms and added a vintage fabric ruffle to the back before I attached the pin. I forgot to take his picture before I sent him off, so this is Barb's photo, and the beautiful Hardanger is hers not mine.

I have been lucky enough to win a couple of blog giveaways recently. The first was from Heidi and was for a gorgeous heart penny rug mat. Here it is looking quite at home on my new (old) sewing table, which used to belong to a very dear aunt, and has now come home to live with me.
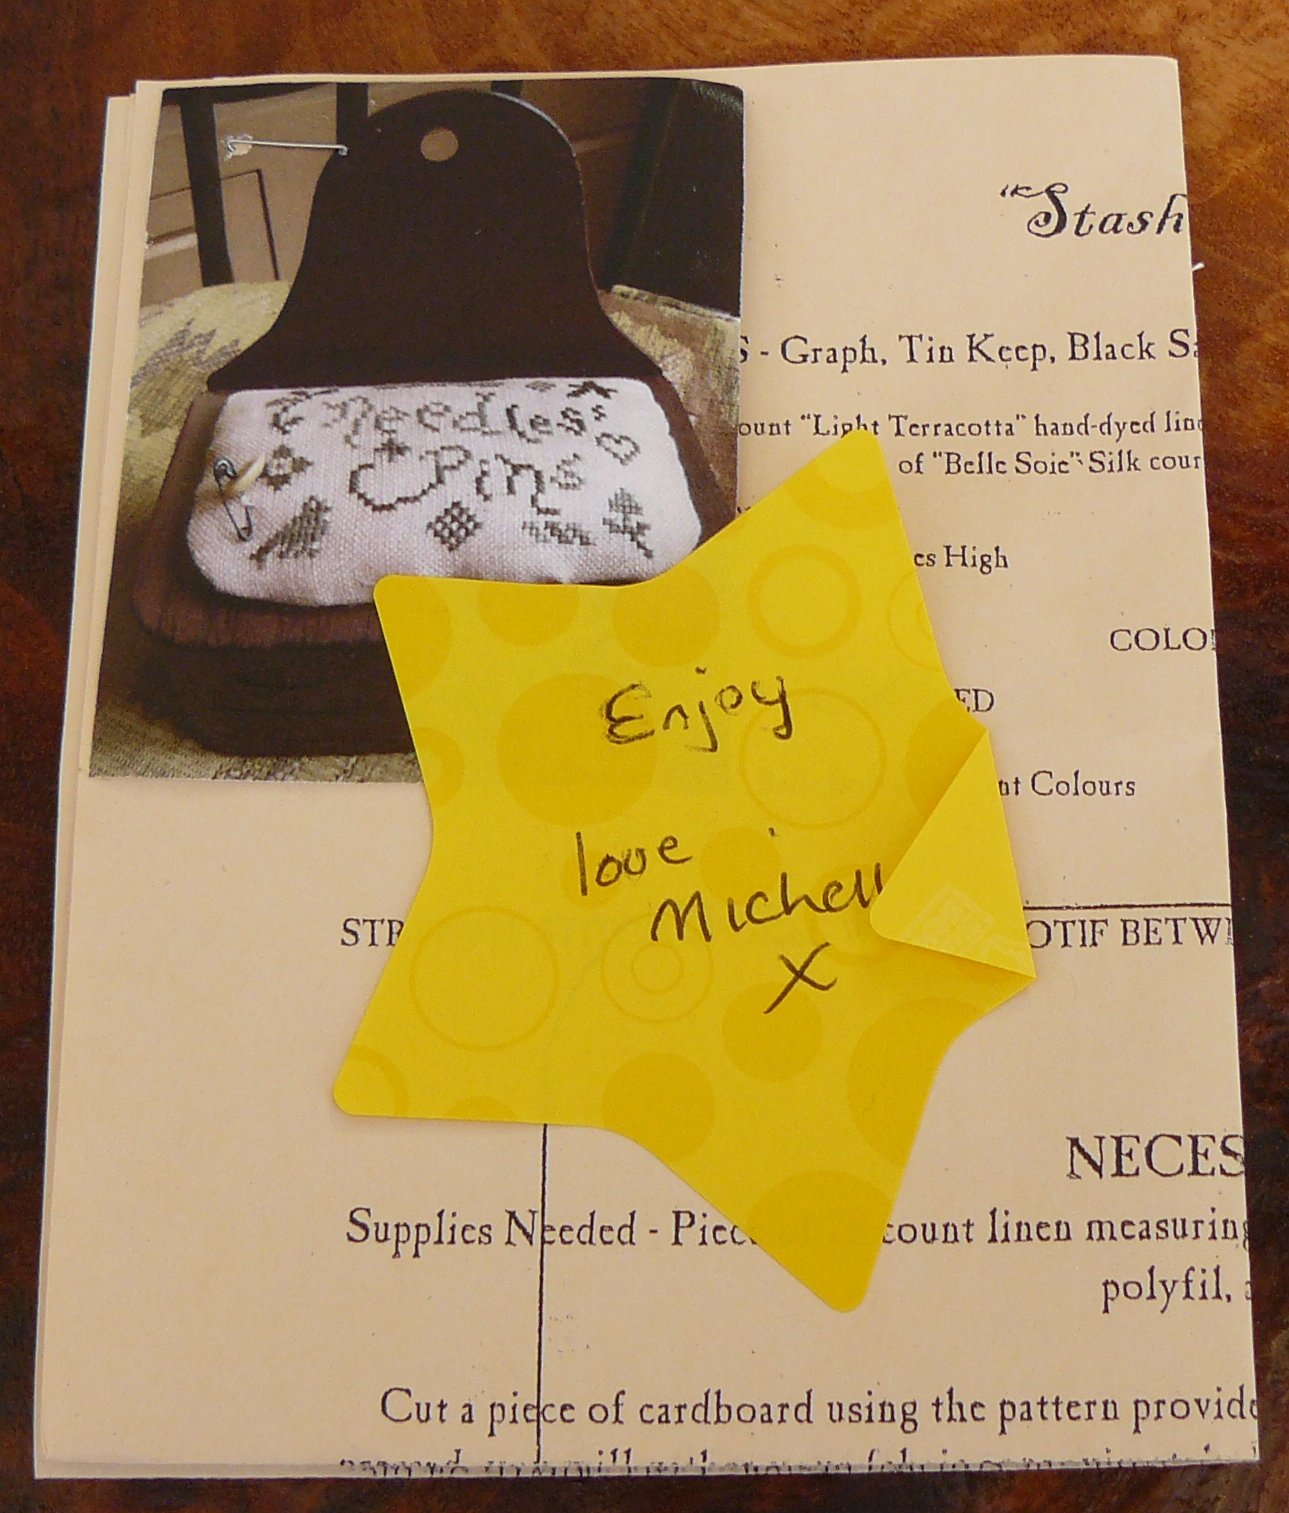
The second was this wonderful  Homespun Elegance Needles and Pins chart which I got from Michelle, I don't have a stash keep to put it on, but I've got a tin which should be just about perfect for it.

Last, but not least, I received a gift from Barb during the week. This adorable little tweed coin purse with it's big, bright corsage is just so me!
Thank you all ladies, I'm feeling very blessed this week.

Sunday, 5 February 2012

A review, some stash and a knit-along

I received an email recently inviting me to review one of the cross stitch kits from Yiota's X-Stitch - www.yiotas-xstitch.com  
I spent a long time on Yiota's website browsing all the different designs she has to offer. Something for everyone is a bit of a cliche, but in Yiota's case it is quite justified, the site offers a huge range of designs in a wide variety of styles, covering almost every subject matter you could care to think of.  There were several designs which caught my fancy, but I found myself coming back time and again to the William Morris designs. I've always had a thing for the Pre-Raphaelite Brotherhood. Goes with my love of the gothic I suppose. I eventually chose a Morris design called Lily, and sat back and looked forward to it's arrival.
The kit arrived quickly and well packed in a sturdy board backed envelope, and is well presented and thought out. 
The chart is spread across two A3 sheets with a clearly marked overlap, and uses large, clear computer generated symbols, and full instructions are provided. 
The evenweave fabric (all the kits come with a choice of aida or evenweave) is generously sized, with a needle tucked into the corner so that the kit is ready to start right away, and the threads (Madeira) are pre-wound onto cardboard bobbins and clearly labelled by shade number, a real bonus when so many similar shades are involved in a design. 
If I had to change one tiny thing about the kit, I would have liked to find the fabric serged at the edges, but that is quite trivial, and doesn't detract from the overall quality of the kit.
The design itself seems to be a sympathetic conversion of the original artwork, with nice clean lines and subtle gradations of colour, and I'm really looking forward to stitching it. I've got a long train journey coming up next weekend and I think I will probably start it then, so watch this space for updates.
I also got some new hand dyed linens and threads this week from Sparklies, a company I hadn't used before, and I have to say I am very pleased with my purchases. The fabric colours are (clockwise) Black Dahlia, Rainforest, Vireo and Parchment. I particularly love the Parchment colour, I think it will be useful for a lot of things.
Have you seen the Knit-along Deramores are running in conjunction with Rowan Yarns? As soon as I saw this I knew I wanted to knit it, and ordered the wool (Rowan Alpaca Cotton). It came the next day and I started right away. The wool is cloud soft, and knits up beautifully, and I am totally besotted with this wonderful muted damson colour. This is my progress so far. Hope the cold weather doesn't end before I've finished, I need an excuse to wear this.

Sunday, 29 January 2012

Challenge reveal an unsatisfactory bird watch and another jumper transformed

It's reveal day for the Monthly Challenge on Needlecraft Haven. This month we did a Russian Doll design from Les Chroniques de Frimousse. Mine is stitched using mainly Carries threads in Baby Teal, Peacock, and Gold, on Crafty Kitten fabric in Icicle, and finished fairly simply as a hanging decoration. I left off the snowflakes as I wanted to display it year round, and changed the text to read "from Russia with love".
The album with the other finishes is here.
A week or so back I saw this sweater makeover project from Tea Rose Home, and I thought it looked like fun, so off I trotted to the charity shop, where I found this pretty but plain cardi.
I pretty much followed the tutorial, adding some godets and a bias trim around the neckline using a small printer's sample of liberty print fabric I had lying around, and then added some lace, fabric yoyos, and a handful of vintage buttons I've been dying to showcase somewhere, and this is the result. I think it looks a bit like something from Per Una.
The RSPB great garden birdwatch was this weekend. I got  a very poor showing this year because Bill decided it was a good day to sit out on the patio and intimidate all the birds:-
Two each of sparrows, blackbirds, bluetits, chaffinches and magpies, and one solitary starling. No thrushes, wrens or goldfinches at all, even though I know they are there.
I'll leave you with a picture of Eloise, in full Harley Quinn mode, modelling her lego creation from last week. Linda, will recognise the transatlantic jeans which she very kindly helped us acquire at Christmas.

Sunday, 22 January 2012

Sun, fur and lego

We've had some beautiful clear mornings here in the last week. I thought you might like to see this view from our back bedroom of the sun rising over Bodmin Moor.
In creative news, I set forth yesterday armed with Issue 9 of Mollie Makes (yes I know issue 10 is out now, I've got plans for that one too...), a cheap and cheerful Asda cardigan, half a yard of faux fur fabric and my trusty sewing machine (which I secretly suspect is smarter than I am). 
I had to re-draft the pattern as the one in the magazine was cut for a cardigan with a higher neckline, but here is the result, a little bit of retro chic, plus enough of the fur left over to make a snuggly cushion at a later date.
I've been playing with washers and hex nuts again too, I might have something new to show soon.


And the lego, you ask. Well, I bought Eloise this book for Christmas, and she has been inspired.
Look at this necklace she created from Lego. 
Very Harley Quinn. 
(Note for Linda, it goes really well with a certain pair of jeans)

Sunday, 15 January 2012

Travelling Pattern, and a Tutorial

First up, the Travelling Pattern.
Here is my completed and framed version.
The next stitcher for the travelling pattern will be

(drum roll please)


Kate

Kate can you email me with your postal address please?


You might remember the hex nut bracelet I made a couple of weeks back. I've been having a play, and I think I've got them coming out how I envisioned them now. They are similar to the ones on Honestly...wtf, but since I started them and finished them differently to theirs I decided to write up a tutorial for the whole process.

You will need:-

a bag of hex nuts from your local builder's merchants/ DIY store. These are apparently M4 hex nuts, basically I just bought the smallest they had. They cost me the princely sum of 3p each. You'll need between 3 and 4 dozen depending on the size of your wrist and how tight you braid them.
Ignore the washers, they are for a different project.
Stringing material. After experimenting I found that the suede thong worked best, the nuts dont slide about on it as much while you are working. Cotton cord worked quite well too, but ribbon was a bit too flimsy.
A clasp of your choice, split rings to attach it with, and  a pair of the toothed jaw type ribbon clamp ends.

Cut 3 pieces of your chosen stringing material each approximately a foot long. (some of the length is taken up in the braiding & you need more than you think, better to have to cut a bit off at the end than not have enough)
Place them side by side in the jaws of the clamp ~ I like to put a drop of craft glue in as well for extra hold ~ and squeeze it closed with pliers. Using a split ring attach one part of your clasp. I don't recommend using a jump ring as the finished bracelet is heavy and it may pull open.
Plait the pieces together for about 1/2 inch.

thread a nut onto the next end to be plaited in and push it up as far as you can before crossing the end into the centre.

Repeat with the opposite side.
Continue as set, threading nuts onto alternate sides as you plait, and keeping them pushed well up
until your braid is around 1" short of your desired finished bracelet length, then plait without nuts for a short distance to match the first side.
This is the part where having an extra hand would come in very handy, but unless you are Zaphod Beeblebrox you are going to have to find something to hold the braid in place with. I used this tiny decorative clothes peg.
Once you have your peg (or Zaphod hand)  in place to hold the braid, snip off the excess, and again add a dab of glue before fastening on the 2nd ribbon clamp.

Ta da! Your lovely bracelet. They are so chunky and satisfyingly heavy to wear.

And here is a gallery of different styles
I love the effect on the turquoise one, which was made by alternating zinc and brass nuts.
The pale pink one is done with waxed cotton cord which, as you can see, allows you to fit the nuts much closer together creating a denser bracelet.
The white one is threaded in a completely different way, I'll explain that one another time.

Wednesday, 11 January 2012

Quick heads up

If you pop over to The Victorian Motto Sampler Shoppe she is having a give away for some beautiful hand dyed threads. To join in the fun just sign up as a follower and say I sent you (sounds like a line from a cheesy spy film).

Don't forget to comment on the post below by Sunday if you want to be the next stitcher of the travelling pattern